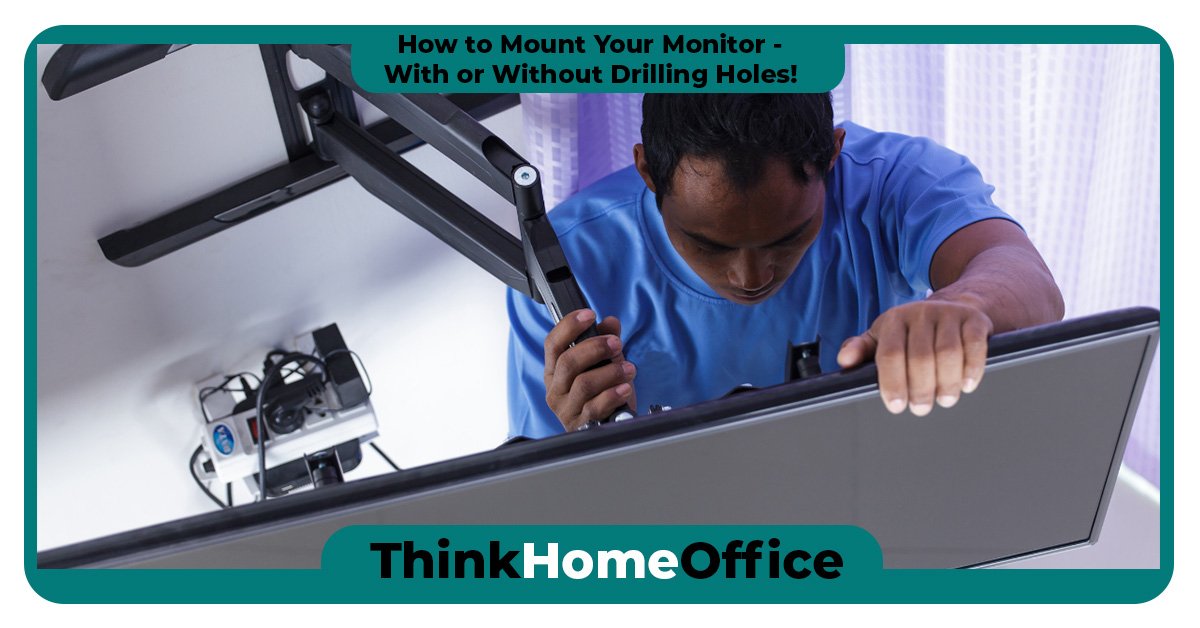
Mounting a computer monitor in your home office can offer numerous benefits, such as freeing up desk space, improving ergonomics, and creating a more organized workspace; it will also look more professional and neater. However, not all monitors come with built-in VESA holes for easy mounting. Don’t worry though, because in this comprehensive guide, we will explore various methods and options on how to either wall or desk mount a monitor with and without the need for drilling holes.
First, Lets explain what VESA is..?
VESA is an associated standard, it stands for – Video Electronics Standards Association. It is a standard for attaching flat panel displays / TVs / LCD/ LED monitors, etc to mounts designed to attach them to fixtures and fittings. There are 3 common VESA classifications:
The VESA logo printed to a mount or appliance indicates that the screen is compatible with one of the 3 VESA standards. More on VESA can be found here.
Mount a Monitor Without Drilling Holes
If you prefer not to drill holes in your monitor or wall, there are alternative options available.
Note: We would never advise you to drill holes into your monitor, TV or screen in an attempt to mount it!
Let’s take a look at some methods to avoid drilling:
1. VESA or Non-VESA Adapter Kits
One of the most common and effective ways to mount a monitor without holes is by using VESA or non-VESA adapter kits. These kits are designed to provide a secure mounting solution for monitors that do not have built-in VESA holes.
VESA adapter kits come in various sizes and can be easily attached to the back of your monitor. They usually consist of adapter plates that need to be screwed or clamped onto the monitor. Once the adapter is installed, you can attach it to a VESA-compatible Desk Clamp or Monitor Stand.
Non-VESA adapter kits are specifically designed for monitors that are not VESA compliant. These adapters often provide adjustable clamps or brackets that can securely hold your monitor to allow it to be mated to a VESA adapted.
It’s important to note that non-VESA adapters may not be as widely available as VESA adapters, and may have limitations in terms of availability, compatibility or adjustability. This is mainly due to most panels, TVs and monitors having broadly adopted the standard for a number of years now.
2. Monitor Clip-on Mounting Kits
Another option for mounting a monitor without holes is to use clip mounting kits. These kits typically consist of four adjustable arms that clip onto different areas of your monitor, providing a secure hold. The arms can then be connected to a wall mount or stand using a mounting kit and bracket.
Clip mounting kits are less invasive as they do not require any permanent modifications to your monitor. They are generally compatible with various screen sizes and offer adjustable movement options.
We do have to say they are not the most aesthetic of options, and it’s important to consider that the arms of the clip may slightly overlap the edges of the monitor, which may not be preferred by everyone, but will provide you with a solution without drilling either your monitor or the wall!
Examples of No drilling solutions that are not VESA standard mounts:
No products found.
Mount a Monitor on Your Desk
Need to know how to mount a monitor without the need for drilling holes, or just want it mounted from a desk?
The best approach is to opt for either a Clamped Desk Mount, or simply mount the monitor on your desk with the stand that comes with it as standard. There are many differing Desk mounted options available, for single, dual, triple and even more monitor setups. They simply clamp to your desk.
Some models will have an adapter, or have holes pre-drilled into its base if you would prefer to screw the mount to your desk.
Most modern mounts will be VESA compliant, but should you have an older type monitor, then you will have to go for a non-VESA adapter. As discussed above, this will bolt to the mount allowing you to secure the older monitor.
Mount a Monitor on the Wall with Drilled Holes – Using a VESA Mount
If you are comfortable with drilling holes in your wall, you can opt for a more traditional wall mounting method. This will mean you won’t even need a desk, or if you have one – you’ll now get more surfsce space back. Here’s how you can do it:
1. Confirm VESA Compliancy
Before drilling any holes, it’s essential to check if your monitor is VESA compliant. These holes are typically arranged in a square or rectangular pattern.
To determine if your monitor is VESA compliant, check the back of your monitor for a pattern of four mounting holes. The hole pattern measurements are usually specified in millimeters, such as 75 x 75 mm, 100 x 100 mm, 200 x 100 mm, or 200 x 200 mm.
If your monitor has these mounting holes, you can proceed with the wall mounting process. If in doubt, refer to the VESA links given above.
2. Verify You Have the Necessary Tools

To mount your monitor on the wall, you’ll need the following tools:
- Stud Finder: Use a stud finder to locate the wall studs for maximum support. Most modern stud finders are also capable of locating other hidden objects like power cables and pipes.
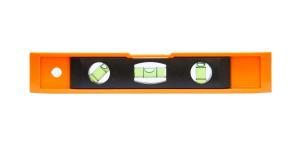
- Spirit or Laser Level: Ensure that your monitor will be mounted horizontally by using a level.
- Power drill: A power drill will make the drilling process easier and faster. Ensure you have one capable of drilling into your wall. If you have brick walls, you will need a drill with ‘Hammer Action’.
- Drill bits: Use the appropriate drill bits for creating holes to locate wall plugs and screws. Masonry drill bits for brick and concrete, Wood drill bits for lumbar.
- Fixings: Use screws and anchors that are suitable for your wall type and the wall mount. More often than not, the mount will come with fixings included – but ensure they are right for the wall. For example, suitably rated Drywall Anchors.
- Screwdriver: Use a screwdriver, or drill-driver, to drive the screws and bolts into the wall and the wall mount.
3. Find Wall Studs and Mark the Mounting Holes
Studded wall – Where your wall is boarded/ plastered over lumbar studs.
1. Use a stud finder to locate the wall studs – consider a multi function model, so you can also locate any live wires or water pipes in the area where you will mount your monitor. Studded walls should have services located out of the way of any ingress by fixings – but that is if there were fitted strictly to code!
Mark the position of the studs using painter’s tape or a pencil. Ideally you will locate at least one stud that you can screw into. This step is crucial to ensure that your monitor is securely mounted to the wall.
Should you have no option to secure it to at least one stud, you may need Plaster/ Drywall fixings that are rated for the weight of the Monitor (and mount!).
2. Next, position the wall mount on the wall and use a level to make sure it is horizontal. Mark the points where you will drill the mounting holes.

Ensure these holes align exactly with the mounting holes on the back of your mount.
Solid wall – Where your wall is made of brick, stone or concrete.
Observe the area of the wall where you wish to locate your monitor to see if there any power outlets in the area, so you have an idea of where there may be any live wires. Consider using a Wire/ Pipe Locater to find if there are any concealed wires or water pipes in the position where you will mount your monitor.
4. Drill Holes and Attach the Wall Mount
Using a power drill and the appropriate drill bit, drill holes into the marked positions on the wall.

If a studded Wall – Make sure the pilot holes are slightly smaller than the screws that will be used to retain the Monitor Mount.
If a solid Wall – Drill the holes to the correct diameter for the retaining Wall Plugs or Anchors you are using. The correct guidance should be given on the components packet/ packaging.
Once the holes are drilled, attach the wall mount to the wall using the screws provided with the wall mount, or a fixing suitable to the type of anchor you have chosen to use. Ensure that the wall mount is securely fastened to the wall and aligned horizontally.
Congratulations! That’s the most difficult part of the task done, now lets get that monitor up there.
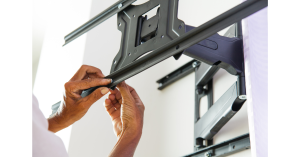
5. Secure the Mounting Plate to the Monitor
Locate the attachment holes on the back of your monitor. These holes may already have screws in them and may be covered in plastic. If not, check your monitors packaging!
Align the mounting plate with the attachment holes on your monitor and use the appropriate screws to secure it in place. Make sure the mounting plate is firmly attached to the back of your monitor.
Note – Some mounts may have not have a separate mounting plate, the Mount may be a single entity, this step is therefore redundant.
6. Mount the Monitor to the Wall
If your mount has a mounting/ back plate – With the wall mount securely attached to the wall and the mounting plate attached to your monitor, it’s time to mount your monitor. Carefully lift your monitor and align it with the wall mount, as described in the units instructions.
If your mount has a mounting/ back plate – Follow the instructions provided with your wall mount to properly connect and secure your monitor to the wall mount.
Mounting a Non-VESA-Compliant Monitor
If your monitor is not VESA compliant and does not have built-in mounting holes, you can still mount it using adapter kits. Here’s what you can do:

- Determine the monitor specifications: Measure the size and weight of your monitor. This information will help you choose the appropriate adapter or mounting solution.
- Use the non-VESA adapter kit: Look for a non-VESA adapter kits that is compatible with your monitor’s size and weight.
- Choose a mounting solution: Lets assume you have fitted a VESA wall mount like described above.
- Install the adapter to the monitor: Follow the instructions provided with the adapter kit to install the adapter onto your monitor.
- Mount the monitor: Follow the instructions provided with the non-VESA-compliant adapter to fix it to the previously installed wall mount.
Congratulations! That’s the monitor up there, now it’s time to get it adjusted as you require.
7. Adjust the Monitor Position
Once your monitor is mounted, you can adjust its position to achieve your desired viewing angle and height. Most wall mounts allow for tilt, swivel, and height adjustments, so you can find the most comfortable and ergonomic position for your monitor.
Of course, all you will now have left is to fit the power and video (Display Port/HDMI/DVI) cabling, then you’re all set!
If you are unsure of whether to go ahead with buyingh and fitting a wall Mount for your monitor, lets explore the benefits of a wall mounted monitor against those where it is mounted on your desk.
Benefits of Mounting a Monitor on a Wall
Mounting your computer monitor on a wall offers several advantages that can enhance your workspace and improve your overall experience, these benefits are:
- Space-saving: Wall mounting your monitor frees up valuable desk space, allowing you to declutter and have more room for other essential items.
- Better aesthetics: Mounting your monitor on the wall creates a cleaner and more organized workspace, with cables and wires neatly tucked away.
- Security: Wall-mounted monitors are less prone to accidental knocks or falls, providing a more secure setup. They are also a more difficult proposition for the casual thief.
Benefits of Mounting a Monitor from the Desk
While wall mounting offers numerous benefits, mounting a monitor from the desk also has its advantages, here are some reasons to consider desk-mounted solutions:
- Flexibility: Desk-mounted monitor arms or stands offer greater flexibility in adjusting the height, tilt, and position of your monitor. This allows for a customized setup that suits your specific needs.
- Easy accessibility: With a desk-mounted monitor, you can easily adjust the position and angle of your screen to accommodate different tasks or preferences.
- Portability: Desk-mounted solutions are often more portable than wall-mounted setups, making it easier to reposition or move your monitor when needed.
- Style and aesthetics: Desk-mounted solutions can add a sleek and modern look to your workspace, allowing you to showcase your monitor as a centerpiece. Though if a wall mount is done right – it’ll be hard to beat.
To Wrap Up…
In conclusion, VESA or not VESA, now that is the question..? Well, it’s not really, you can do either, though VESA standard fittings make it easier, and give you more options. It is down to you decide where the best place for a monitor is though; on the wall, or on your desk?
So what do you want, and for what benefit?
Whichever option you choose this guide should help you do either of them and, gives you an option if you just don’t do DIY! Whichever route you take, we hope this has helped to get you started.
Frequently Asked Questions (FAQs)
Q. Can any monitor be mounted on the wall?
Most modern monitors are VESA compliant and can be easily mounted on the wall. However, some older models of monitors may not have VESA mounting holes, or may require additional adapters for mounting.
Q. How do I know if my monitor is VESA compliant?
Check the back of your monitor for a pattern of four mounting holes. The hole pattern measurements are usually specified in millimeters, such as 75 x 75 mm or 100 x 100 mm.
Also, check for the VESA logo on any packaging:
Q. Can I mount a monitor without drilling holes?
Yes, you can mount a monitor without drilling holes by using VESA or non-VESA adapter kits or clip mounting kits which can clamp to your desk. These options provide secure mounting solutions without the need for permanent modifications.
Q. What tools do I need to mount a monitor on the wall?
You will need a stud finder or (ideally) a multi function version to check for hidden wires and pipes, a level, power drill, drill bits, wall mount, fixings, and a screwdriver. Make sure to choose tools and fixings that are appropriate for your wall type and the weight of your monitor.
Q. Can I mount a non-VESA-compliant monitor?
Yes, you can mount a non-VESA-compliant monitor by using adapter kits specifically designed for non-VESA monitors. These kits provide alternative mounting solutions for monitors that do not have built-in VESA holes.
Q. What are the benefits of mounting a monitor on the wall?
Mounting a monitor on the wall frees up desk space, improves ergonomics, provides better viewing angles, enhances organization, increases productivity, and offers a more secure setup.
Q. What are the benefits of mounting a monitor from the desk?
Mounting a monitor from the desk offers flexibility, easy accessibility, portability, compatibility with unconventional monitors, cost-effectiveness, and normally requires no invasive drilling or fixing.
Q. Are there any alternatives to wall mounting a monitor?
Yes, if you prefer not to mount your monitor on the wall, you can consider using monitor stands, arms, or ergonomic solutions that fix to your desk by usung a clamp, this allows for adjustability, positioning and easy installation.
Q. Can I mount a monitor on a reclining computer chair?
Some reclining computer chairs come with built-in monitor mounts or holders. However, it’s essential to check the specific features and compatibility of your chair before attempting to mount a monitor on it.
Q. Can I mount a TV or Monitor on a gaming chair?
Gaming chairs are primarily designed for comfort and support during gaming sessions and may not be suitable for mounting a Monitor or TV. It’s recommended to use dedicated Monitor/ TV mounts or stands for larger displays.
Q. How do I ensure the stability of a wall-mounted monitor?
To ensure the stability of a wall-mounted monitor, make sure to choose a wall mount that is appropriate for the weight and size of your monitor. Also ensure you use fixings that are suitable to your wall type, and the load they need to support. Follow the manufacturer’s instructions for proper installation and regularly check for any signs of instability or loose fittings.
Q. Can I mount multiple monitors on the same wall?
Yes, it is possible to mount multiple monitors on the same wall by using multiple wall mounts or a multi-monitor mounting system. Make sure to use the right wall fixings to support them, and to plan the positioning and spacing of the monitors to create an optimal viewing setup.
Q. Can I mount a monitor on a plasterboard wall?
Yes, you can mount a monitor on a plasterboard (Drywall) wall. However, it’s important to use appropriate wall anchors, such as toggle bolts or wall anchors specifically designed for Drywall, to ensure a secure installation.
Q. Can I mount a monitor on a brick or concrete wall?
Yes, it is possible to mount a monitor on a brick or concrete wall. You will need appropriate masonry drill bits, screws, and anchors designed for use with brick or concrete to ensure a secure mounting.
Q. How do I hide the cables when wall-mounting a monitor?
To hide the cables when wall-mounting a monitor, you can use cable management solutions such as cable raceways, cable clips, or cable sleeves. You could also opt to rebate the wall, to bury the cabling out of sight, and then re-plaster the wall. These options help keep the cables organized and out of sight, creating a clean and professional look.
Q. Can I mount a monitor on a slanted or angled wall?
Mounting a monitor on a slanted or angled wall may require specialized wall mounts or brackets designed for such installations. Make sure to choose a wall mount that is compatible with the angle and weight distribution of your monitor.
Remember to always follow the manufacturer’s instructions and guidelines when mounting a monitor to ensure safety and proper installation.