In today’s digital age, video calls and live streaming have become increasingly prevalent, whether it be for professional purposes or personal connections. However, one aspect that can often be overlooked is the importance of light positioning. Proper light positioning can greatly enhance the quality and professionalism of your video calls and live streams, helping you make a lasting impression and effectively deliver your message. In this article, we will explore the essential techniques and tips to optimize light positioning, ensuring that you always put your best foot forward in the virtual world.
Understanding the Basics of Lighting
Importance of light in video communication
Lighting plays a crucial role in video communication, whether it’s for video calls or live streaming. Proper lighting enhances visibility, clarity, and overall video quality. It helps to eliminate shadows, glares, and other distractions that may affect the viewer’s experience. Understanding the importance of light in video communication is essential to create a professional and engaging visual presence.
Fundamental concepts in lighting for video
To optimize light positioning for video calls and live streaming, it’s important to grasp the fundamental concepts of lighting. Key concepts include understanding light intensity, color temperature, and different types of light sources. Light intensity refers to the brightness of the light sources and has a direct impact on video quality. Color temperature refers to the warmth or coolness of the light, which can set the mood and tone of the video. Different types of light sources, such as natural light, artificial light, and specialized lighting tools, offer unique benefits and considerations for video lighting setups.
Different types of light sources
When optimizing light positioning for video calls and live streaming, it’s crucial to consider the different types of light sources available. Natural light is a valuable light source, as it is bright and evenly spread, providing a more natural and pleasing aesthetic. However, it can vary throughout the day and is affected by external factors such as weather conditions. Artificial light, on the other hand, provides consistent and controllable lighting conditions but requires careful positioning to avoid harsh shadows or glares. Specialized lighting tools like ring lights, light diffusers, and reflectors offer additional options to enhance lighting in specific situations.
Evaluating Your Current Lighting Conditions
Assessing natural light in your space
To optimize light positioning for video calls and live streaming, start by assessing the natural light in your space. Position yourself near windows or in well-lit areas to take advantage of natural light. Assess the direction and intensity of the sunlight at different times of the day to determine the optimal positioning for your video setup. Balancing the natural light with artificial light sources can help create a more consistent and flattering lighting environment.
Checking present artificial light sources
In addition to natural light, it’s important to evaluate the present artificial light sources in your space. Take note of the type of artificial lights, such as overhead lights, desk lamps, or floor lamps, and their positioning. Identify any problematic areas where shadows, glares, or backlights are causing issues. This assessment will help you determine how to complement or adjust the existing artificial light sources to optimize your video lighting setup.
Identifying problematic areas: shadows, glares, and backlights
During the evaluation of your current lighting conditions, carefully identify any problematic areas that may negatively impact your video calls and live streaming. Shadows can be distracting and make it difficult to see your facial expressions or gestures. Glares can cause reflections on screens or objects, hindering visibility. Backlights can create a silhouette effect, making it hard for viewers to see your face clearly. By identifying these issues, you can strategically position lights and make adjustments to create a more visually appealing and professional video environment.
Introducing Three-Point Lighting
Defining three-point lighting
One effective lighting technique that is commonly used in video calls and live streaming is three-point lighting. Three-point lighting involves using three different light sources strategically positioned to create a well-balanced and flattering lighting setup. The three light sources include the key light, fill light, and back light. Each light serves a specific purpose, contributing to overall visual quality and depth in the video.
How to set up three-point lighting
To set up three-point lighting, begin by positioning the key light. This light source is the most important and should be placed at a 45-degree angle from the camera, slightly above eye level, and pointed towards the subject’s face. The key light provides the primary illumination and helps define the subject.
Next, position the fill light. This light source is placed on the opposite side of the key light, filling in the shadows created by the key light. The fill light should be softer and less bright than the key light to provide a natural and balanced lighting effect.
Lastly, position the back light. This light source is placed behind the subject, aiming towards the back of their head or shoulders. The back light helps separate the subject from the background, creating depth and visual interest.
Benefits of three-point lighting for video calls and live streaming
Implementing three-point lighting for video calls and live streaming offers several benefits. Firstly, it provides a more professional and high-quality visual appearance. The three-point setup helps eliminate shadows, evenly illuminates the subject’s face, and adds depth to the video. Secondly, it enhances the subject’s visibility and clarity by reducing glares and silhouettes. Lastly, using three-point lighting helps create a more engaging and immersive video experience for the viewer, improving overall communication and connection.
Positioning The Key Light
What is the key light
The key light is the primary light source in three-point lighting setups. It provides the main illumination and sets the overall tone and mood of the video. The key light is typically the brightest light in the setup and is positioned to highlight the subject’s face.
Where to position your key light for optimal results
To achieve optimal results, position the key light at a 45-degree angle from the camera, slightly above eye level, and pointed towards the subject’s face. This angle helps create depth and adds dimension to the subject’s features. Avoid positioning the key light directly in front of the subject, as it can create harsh shadows or wash out their features. Experiment with the distance and height of the key light to find the most flattering lighting effect for your specific setup.
Suggestions for key light sources
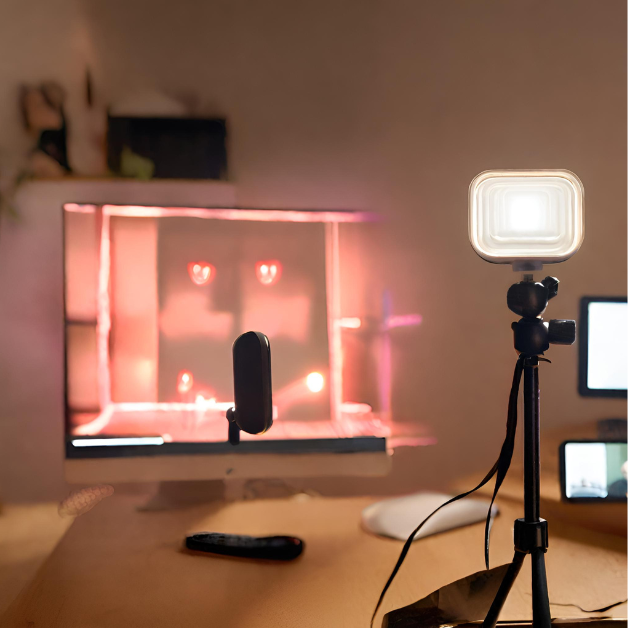
When selecting a key light source, consider using professional lighting equipment such as LED panels or softboxes. LED panels offer adjustable brightness and color temperature, allowing for customization based on your specific needs. Softboxes help diffuse the light, creating a softer and more flattering lighting effect. Using these types of key light sources will contribute to better video quality and overall visual appeal.
Adjusting the Fill Light
Understanding the role of the fill light
The fill light serves to fill in the shadows created by the key light, providing a more balanced and even lighting effect. It helps soften the contrast between light and shadow, enhancing the subject’s visibility and overall appearance.
Best spots to place your fill light
Position the fill light on the opposite side of the key light, at a lower intensity than the key light. This positioning ensures that the fill light does not overpower the key light, maintaining a natural lighting effect. Experiment with the distance of the fill light to achieve the desired level of fill, ensuring that it fills in the shadows without creating additional harsh lighting.
Suggestions for fill light sources
When selecting a fill light source, consider using softer and less intense options compared to the key light source. Adjustable LED panels or smaller softboxes are suitable choices for fill lights. These sources offer flexibility in controlling the brightness and color temperature, allowing you to achieve a flattering and balanced lighting effect.
Setting Up the Back Light
Purpose of the back light in video calls
The back light serves a specific purpose in video calls and live streaming setups. Positioned behind the subject, the back light illuminates the back of their head or shoulders, creating separation from the background. This separation adds depth and visual interest to the video, making the subject stand out.
Optimal positioning of the back light
To achieve optimal results, position the back light slightly behind and above the subject, aiming towards their head or shoulders. This positioning helps create a subtle halo effect around the subject, separating them from the background and providing a three-dimensional appearance. Avoid having the back light too close to the subject, as it can create harsh highlights or shadows.
Tips to choose the best back light
When choosing a back light source, consider using a smaller and less intense light compared to the key light. This ensures that the back light does not overpower the overall lighting setup. LED panels or spotlights are suitable options for back lights, offering adjustable brightness and directional control. Experiment with the placement and intensity of the back light to find the most visually appealing and balanced result.
Controlling Light Intensity
How light intensity affects video quality
Light intensity directly affects video quality and the overall visual experience. Insufficient light intensity can result in a dim or grainy video, making it difficult for viewers to see details. On the other hand, excessive light intensity can cause overexposure and wash out the subject, negatively impacting the video’s clarity and aesthetic.
Tools to control light intensity
To control light intensity, consider using dimmer switches or adjustable LED panels for your light sources. Dimmer switches allow you to adjust the brightness of the lights manually, providing precise control over the intensity. Adjustable LED panels offer the flexibility to customize both brightness and color temperature, ensuring the optimal lighting conditions for your video calls and live streaming.
Tips on regulating light intensity
When regulating light intensity, it’s crucial to strike a balance between providing enough light for visibility and avoiding overexposure. Test different lighting setups and adjust the intensity based on the specific requirements of your space and camera. Take into account external factors such as natural light and the time of day, as they can impact the overall light intensity in your video setup.
Managing Color Temperature
Understanding color temperature in lighting
Color temperature refers to the warmth or coolness of light, measured on the Kelvin scale. Different color temperatures can evoke different moods and aesthetics. Warm lights, with lower Kelvin values, create a cozy and intimate atmosphere, while cool lights, with higher Kelvin values, impart a more professional and cool tone.
Balancing warm and cool lights
When optimizing light positioning for video calls and live streaming, it’s essential to strike a balance between warm and cool lights. Too much warmth may result in a yellow or orange tint, distorting colors and skin tones. Conversely, excessive coolness can create a blue or sterile appearance, affecting the overall visual quality. Experiment with different color temperatures and assess how they interact with your space and camera to achieve a balanced and visually appealing result.
How to adjust the color temperature
To adjust the color temperature, consider using LED panels that offer customizable color temperature settings. These panels typically provide a range of Kelvin values, allowing you to either warm up or cool down the lighting. Adjust the color temperature based on your specific preferences and the desired aesthetic for your video calls and live streaming. Regularly test and calibrate the lighting setup to ensure consistent and accurate color representation.
Utilizing Special Lighting Tools
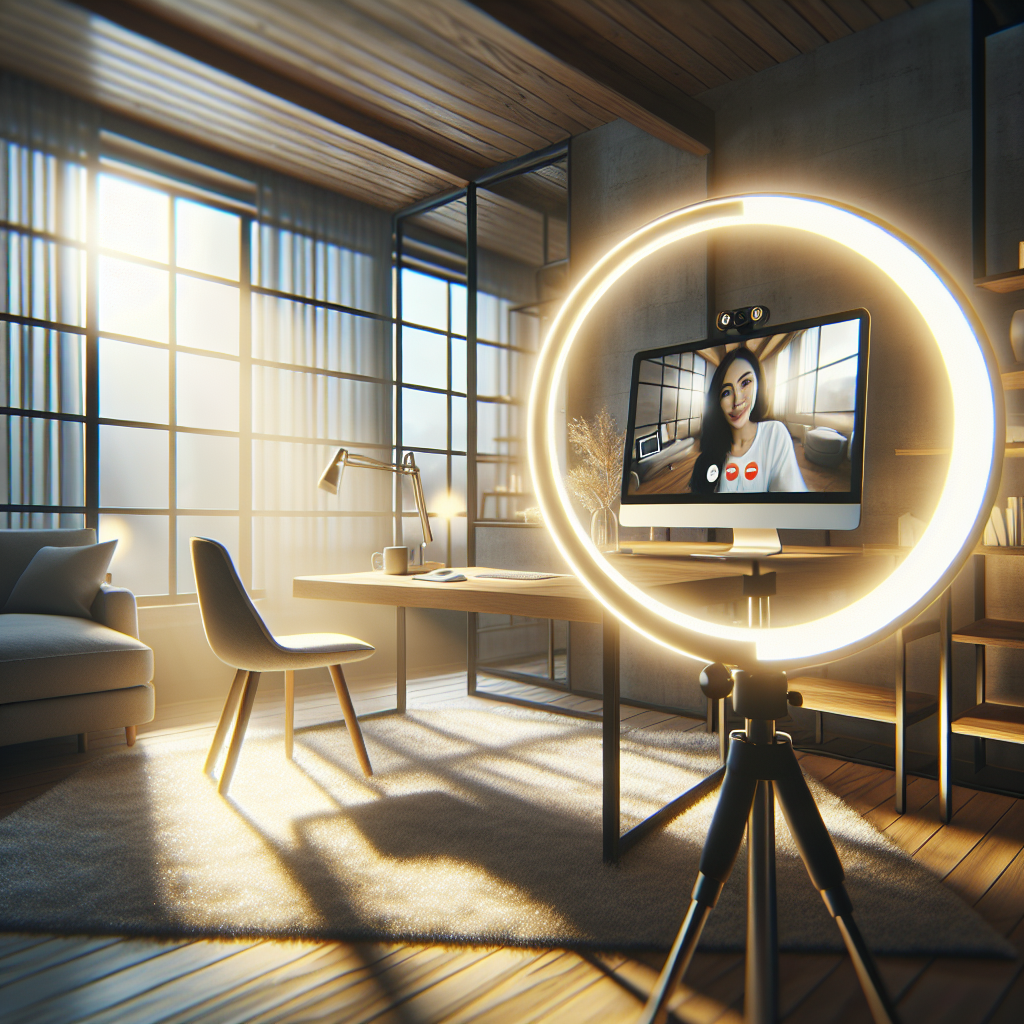
Exploring ring lights
Ring lights have gained popularity in recent years due to their versatility and effectiveness in video communication. They are circular-shaped lights with a centered opening, providing a direct and even illumination. Ring lights help eliminate shadows, reduce glares, and create a unique catchlight effect in the eyes, enhancing the subject’s visibility and overall video quality. Consider using a ring light as a key light source to create a flattering and professional lighting setup.
Considering light diffusers
Light diffusers are essential tools in video lighting setups as they soften and distribute the light more evenly. They help eliminate harsh shadows and reduce glare, resulting in a more flattering lighting effect. Light diffusers can be used with key lights, fill lights, or even natural light sources. They come in various forms, such as softboxes, umbrellas, or diffuser panels. Experiment with different diffusers to find the most suitable option for your specific lighting setup.
Using reflectors for better lighting
Reflectors are versatile tools that bounce light back onto the subject, filling in shadows and providing additional illumination. They come in various shapes, sizes, and materials, such as silver, white, or gold. Silver reflectors provide the most intense and cool reflection, while gold reflectors produce a warm and soft reflection. White reflectors offer a more natural and even bounce of light. Reflectors can be positioned strategically to enhance the key light, fill light, or back light, ensuring a well-balanced lighting setup.
Avoiding Common Lighting Mistakes
Too much backlighting

One common mistake in video lighting setups is having too much backlighting. While the back light is an essential element in three-point lighting, excessive backlighting can create an unnatural and distracting visual effect. It can overpower the other light sources and create excessive highlights or silhouettes. To avoid this mistake, ensure that the back light is positioned and balanced with the other lights to provide a subtle and visually appealing separation from the background.
Neglecting the importance of fill light
Another common mistake is neglecting the importance of the fill light. The fill light helps balance the lighting setup, fill in shadows, and create a more flattering look. Ignoring the fill light or not positioning it properly can result in unflattering shadows or a lack of overall illumination. Ensure that the fill light is adjusted to the appropriate intensity and positioned on the opposite side of the key light to achieve a well-balanced and visually appealing lighting effect.
Overdoing light intensity
Overdoing light intensity is a common mistake that can negatively impact video quality. Excessive light intensity can cause overexposure, wash out the subject, and create a harsh and uncomfortable visual experience for the viewer. It’s important to find the right balance between providing enough light for visibility and avoiding excessive brightness. Regularly test and adjust the light intensity to achieve the desired level for your specific video calls, live streaming, or recording needs.
In conclusion, optimizing light positioning for video calls and live streaming is crucial to enhance visual quality, communication, and overall user experience. Understanding the basics of lighting, evaluating current lighting conditions, and implementing three-point lighting techniques are key steps to achieve optimal lighting results. By properly positioning the key light, adjusting the fill light, setting up the back light, controlling light intensity, managing color temperature, and utilizing special lighting tools, you can create a professional and engaging visual presence in your video communication. Avoid common lighting mistakes and regularly reassess and fine-tune your lighting setup to ensure consistent and high-quality results in your video calls and live streaming endeavors.